In-situ bolt inspection using the Waygate Technologies Krautkrämer Mentor UT PAUT system — detecting fatigue cracking and corrosion without bolt removal.
• APPLICATION NOTE
Phased Array Ultrasonic Testing of Threaded Fasteners
Overview and Scope
Threaded fasteners – bolts, studs, anchor rods, and tie rods – are among the most safety-critical components in engineered structures. Despite their apparent simplicity, fasteners sustain complex triaxial stress states arising from the combination of pre-load (clamp force), dynamic service loading, and thermally induced strain cycling. These conditions promote two primary degradation mechanisms that develop sub-surface and are invisible to visual inspection: fatigue cracking and internal corrosion.
This application note describes the deployment of the Waygate Technologies Krautkrämer Mentor UT Phased Array Ultrasonic Testing (PAUT) system for the volumetric examination of in-situ bolts across a range of industrial sectors. The methodology follows the principles of EN ISO 16810 and ASTM E2700, adapted for the specific geometry and access conditions encountered during bolt inspection.
The Mentor UT platform – with its dedicated Bolt Inspection App – standardises the acquisition protocol, eliminates operator variability, and delivers a reproducible 360° volumetric dataset from which flaw characterisation, depth sizing, and fitness-for-service assessment can be derived without bolt removal.
Fastener Failure Mechanisms
Fatigue Cracking
Fatigue is the dominant cause of in-service fastener failure. Under cyclic tensile loading, micro-cracks nucleate preferentially at regions of geometric stress concentration – specifically the first engaged thread root (typically 0.3-0.4 x bolt diameter from the bearing face), the shank-to-thread runout, and the under-head fillet radius.
Crack growth is initially slow and sub-critical, governed by Paris Law kinetics. By the time a crack reaches approximately 30-40% of the cross-sectional area it may still be invisible externally, yet residual strength is already critically reduced. Final fracture is typically sudden and brittle, with little plastic deformation as a warning precursor – making periodic volumetric inspection essential rather than optional.
Corrosion Degradation
Bolts in offshore, chemical process, marine, and exposed infrastructure environments are susceptible to uniform corrosion (reducing effective cross-section), pitting corrosion (acting as fatigue initiation points), and stress corrosion cracking (SCC) in susceptible alloy-environment combinations such as high-strength steel in hydrogen sulphide or chloride-rich environments.
Internal corrosion is particularly insidious: protective coatings may remain intact while the underlying material is actively degrading. Ultrasonic amplitude attenuation, backwall echo loss, and grain noise increases are reliable indicators of material degradation that PAUT can quantify.
Equipment Configuration
Mentor UT Platform
The Waygate Technologies Mentor UT is a 32-channel PAUT instrument housed in a ruggedised field tablet form factor, designed for in-plant inspection under challenging environmental conditions.
- Simultaneous multi-channel acquisition: up to 32 transmit/receive elements addressable in a single firing sequence
- Pulse repetition frequency (PRF): up to 10 kHz, supporting high-speed rotational scanning
- Time-base accuracy: +/-1% of full-scale range, critical for accurate depth sizing
- Dynamic depth focusing: focal law recalculation at multiple depths within a single sweep
- Integrated software: dedicated Bolt Inspection App with guided workflow, automatic gate placement, and calibration verification
- Data export: full waveform (A-scan) and image (S-scan, C-scan, B-scan) export to PDF, DICONDE, and proprietary format
Probe Specification: GE0600417
Probe selection is the most significant variable determining inspection sensitivity and spatial resolution. The GE0600417 probe is specified as follows:
| Parameter | Specification |
|---|---|
| Centre Frequency | 4 MHz |
| Number of Elements | 16 |
| Element Pitch | 1.5 mm |
| Active Aperture | 24 mm |
| Element Height | 10 mm (nominal) |
| Connector Type | Lemo 00 push-pull |
| Near-Surface Resolution | 3 mm (water path dependent) |
The 4 MHz centre frequency represents an optimised balance: higher frequencies (5-10 MHz) yield improved resolution but suffer increased attenuation in coarse-grained or corroded material. Lower frequencies (1-2 MHz) provide adequate penetration in long fasteners but sacrifice near-surface resolution.
Couplant and Probe Contact
Standard ultrasonic couplant (cellulose gel, propylene glycol, or equivalent) is applied to the probe contact face and bolt end surface. For rough or corroded bolt end faces, a thin couplant-filled rubber membrane (delay shoe) may be employed to improve acoustic coupling. The optional bolt-rotation fixture provides indexed angular positioning at defined rotational increments (typically 10° or 15°), ensuring complete circumferential coverage.
Inspection Methodology and Workflow
Pre-Inspection Preparation
- Surface preparation: Clean the bolt end face with a wire brush or fine abrasive to remove corrosion products, paint, or contamination. For coated bolt ends, mechanical removal to bare metal is preferred; if coating cannot be removed, record coating thickness for sound path correction.
- Dimensional record: Measure and record bolt diameter, accessible length, material grade/specification, and thread form. These parameters are entered into the Bolt Inspection App to pre-compute focal laws and gate positions.
- Calibration: Perform system sensitivity calibration on a bolt-material reference block with side-drilled holes (SDHs) of known diameter at representative depths, or a flat-bottomed hole (FBH) reflector.
- Environmental conditions: Record ambient temperature. Ultrasonic velocity in steel is temperature-dependent (approximately -0.4 m/s per °C for shear wave in carbon steel); significant temperature deviations require velocity correction.
Bolt Inspection App Workflow

The Mentor UT Bolt Inspection App implements a guided operator workflow that standardises the scan sequence and removes dependence on ad hoc probe positioning:
Data Interpretation: Understanding the Mentor UT Display

Sectorial Scan (S-scan)
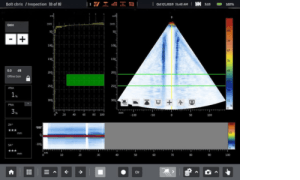
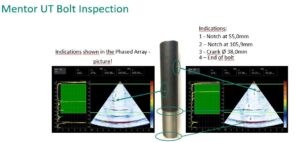
The S-scan is the primary diagnostic view. It presents received amplitude from all focal law angles simultaneously as a colour-coded fan image (dark blue = low amplitude through to red = high amplitude). In a defect-free bolt, the S-scan displays a characteristic central high-amplitude vertical response – the specular backwall reflection. A genuine fatigue crack presents as a discrete reflector interrupting the expected symmetry of the S-scan.
A-scan – Time Domain Waveform
The A-scan provides the fundamental time-domain data used for depth measurement, amplitude sizing against the DAC curve, and signal characterisation (sharp vs. diffuse morphology to discriminate between planar cracks, volumetric scatterers, and geometric artefacts).
C-scan – Circumferential Amplitude Map
The C-scan plots received amplitude against probe rotation angle for a selected depth gate, revealing the circumferential extent and position of any indication. A clean bolt produces a continuous, uniform-amplitude band across the full 360° sweep – a solid high-amplitude band with no isolated spikes or colour breaks.
| Condition | S-scan | A-scan | C-scan |
|---|---|---|---|
| Clean bolt | Strong symmetrical backwall | Stable, no mid-path echoes | Continuous uniform band |
| Fatigue crack | Discrete reflector, asymmetry | Repeatable mid-path indication | Localised spike |
| Corrosion | Generalised amplitude loss | Increased noise, weak backwall | Distributed irregularities |
Exemplar Scan Results – Serviceable Bolt
A serviceable bolt produces a prominent, vertically oriented high-amplitude central response maintaining angular symmetry across the sweep range. Gate A (positioned over the thread engagement zone) and Gate B (mid-shank) show no indications exceeding the evaluation threshold. The C-scan shows a continuous, solid high-amplitude band across the full evaluated circumference. On this basis the bolt is documented as: No recordable indications – Serviceable, continue in-service monitoring per asset integrity programme.

Reporting and Traceability
The Mentor UT generates a fully structured inspection report on-instrument, covering instrument and probe identification, calibration records, bolt details, scan parameters, full image archive in DICONDE format, and a complete indication log with depth, amplitude, and classification for each recordable finding. Reports can be transferred wirelessly or via USB for off-site review.

